Home canning has been a part of our family lifestyle for as long as I can remember. When the harvest was complete and preserved in our family cellar I loved to be the one to give the final count on the fruit of our labors – peaches, pears, applesauce, beets, green beans, strawberry jam, and….PICKLES! I loved the pickles.
One particular winter day I took a walk down to the cellar. I glanced around the room, it was loaded with beautifully home canned fruit and vegetables right from our family garden and area orchards. But…I had my mind set on one thing. I carefully scanned the shelves – Ah ha I found what I was looking for — a jar of dill pickles I had canned myself.
As the bottle came off the self, my mouth started to water. Those pickles looked so good, I could hardly wait to get the lid off the bottle.
I finally made it to the kitchen and popped off the lid – immediately the aroma of those home canned dill pickles floated through the room – I couldn’t wait any longer. Out came the biggest pickle and I sunk my teeth into it.
Surprise! My joy quickly turned to despair when my teeth squished into a soggy dill pickle – not even worth eating! Almost weeping I ran to mother. What bad thing had happened to my pickles?
With a twinkle in her eye and a half smile, she started quizzing me down: “How long did the cucumbers wait before you pickled them?” “What size were the cucumbers that you used?” “Did you get them right out of the hot water bath when it started to boil?” Etc.
After playing detective for a couple of minutes, she chuckled and gave me these important secrets:
3 Family Secrets to Perfect Home Canned Pickles:
1. Pick your cucumbers early in the morning and bottle them within 24 hours. The quicker the better. If you start with fresh, crisp, firm cucumbers you will have a better pickling experience.
2. Don’t let the cucumbers get too big. Smaller cucumbers become better pickles.
3. When you process the bottles of pickles – make sure you DON’T over cook them. The less they are cooked, the more crisp and crunchy they will be.
Believe me, I learned a valuable lesson – one I never forgot! Next time I canned my dill pickles I followed these guidelines religiously. My dream came true – to bite down into a crispy, crunchy, mouth-watering home canned baby dill pickle
Before you can anything, Go to the National Center for Home Canning at: https://nchfp.uga.edu/publications/publications_usda.html
Always follow the guidelines set forth by the National Center for Home Canning at the above link. Do NOT just go by what I may say in my recipes or videos as it could be wrong and cause health issues. I try my best to make sure everything is followed correctly for your safety, but you need to protect yourself and always follow the National Center for Home Canning guidelines whenever you can food yourself.
I wanted to share these family secrets with you so your pickling experience can be a successful and happy one. Good luck fellow pickle lovers!
Bread and Butter Pickles Recipe
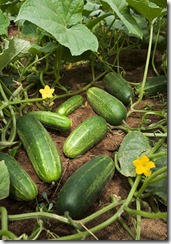
Start with the freshest pickling cucumbers you can find; your pickles are only going to be as good as the produce you start with. The fresher the cucumbers are, the crispier your pickles will be.
Ingredients
- 2 1/2 lbs pickling cucumbers (fresh from the market)
- 1 pound white or yellow onions, thinly sliced
- 1/4 cup pickling salt (can use Kosher salt as a substitute, regular table salt has additives in it that will turn the pickles dark and muddy the color of the pickle juice)
- 1 1/4 cup white distilled vinegar (5% acidity)
- 1 cup apple cider vinegar (5% acidity)
- 2 1/4 cups sugar
- 1 Tbsp mustard seeds
- 1 teaspoon crushed red pepper flakes
- 3/4 teaspoon celery seeds
- 1 inch cinnamon stick
- 6 allspice berries plus a pinch of ground allspice
- 6 whole cloves plus a pinch of ground cloves
- 1/2 teaspoon turmeric
If you are planning to store pickles outside of refrigerator, you will need the following canning equipment:
- 5 pint-sized canning jars, clean, unused lids, metal screw bands for the lids (see Canning jars and lids)
- 1 16-qt canning pot with rack
- Jar lifters or tongs
Method
1 Carefully rinse the cucumbers, scrubbing away any dirt that may have stuck to the ribs. Slice off 1/8-inch from the ends and discard. Slice the cucumbers in 1/4-inch thick slices, place in a large bowl. Add the sliced onions and pickling salt. Stir in so that the salt is well distributed among the cucumber slices. Cover with a clean tea towel (thin towel, not terry cloth). Cover with a couple of inches of ice. Put in the refrigerator and let chill for 4 hours. Discard ice. Rinse the cucumber and onion slices thoroughly, drain. Rinse and drain again.
2 If you are planning to store your pickles outside of the refrigerator for any length of time, you will need to sterilize your jars before canning, and heat the filled jars in a hot water bath after canning. If you are planning to eat the pickles right away and store them the whole time in the refrigerator, you can skip the water bath step. It’s still a good idea to sterilize the jars first, you can do that by running them through the dishwasher, or placing them in a 200°F oven for 10 minutes. To sterilize the jars for canning, place empty jars on a metal rack in a large, 16-qt canning pot pot. (Jars must rest on a rack in the pot, not on the bottom of the pot). Fill with warm water and bring to a boil. Reduce heat to warm to keep the jars hot and ready for canning. Remove with tongs or jar lifters one by one as you can the cucumbers. Sterilize the lids by bringing a pot of water to a boil and pouring water over a bowl containing the lids.
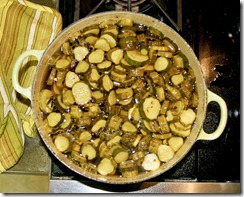
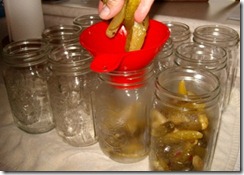
3 In a 4 qt or 6 qt pot, place the vinegar, sugar, and all of the spices. Bring to a boil. Once the sugar has dissolved, add the sliced cucumbers and onions. Bring to a boil again. As soon as the sugar vinegar solution begins boiling again, use a slotted spoon to start packing the hot jars with the cucumbers. First pack a jar to an inch from the rim with the vegetables. Then pour hot vinegar sugar syrup over the vegetables to a half inch from the rim. Wipe the rim clean with a paper towel. Place a sterilized lid on the jar. Secure with a metal screw band.
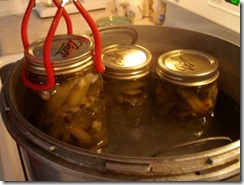
4 If you are planning to store pickles outside of refrigerator, process the filled jars in a hot water bath for 10 minutes. Return filled jars to the same canning pot with its already hot water. Water level needs to be at least one inch above the top of the cans. Bring to a boil and let boil hard for 10 minutes. Remove jars from pot. Let cool down to room temperature. Jars should make a popping sound as their lids seal. If a lid doesn’t properly seal, do not store the jar outside of the refrigerator.
Makes about 5 pint jars.
Dill Pickles
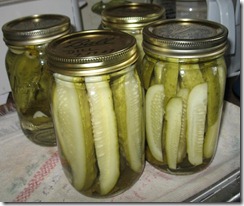

Ingredients:
- 3-4 pounds (1 1/2-2 kilo) young and small cucumbers (dark green, firm, warty skin)
- 2-4 sprigs of fresh dill
- 6-8 cloves fresh garlic, peeled and cut in half
- water
- kosher salt
- white vinegar
Preparation:
1. In a large jar, place 2 sprigs of dill and 3-4 cloves of garlic.
2. Wash and snip off ends of cucumbers. Put cucumbers in the jar until it is full.
3. Add water to the jar, one cup at a time. Then add 1 tablespoon of kosher salt and 2 tablespoons of white vinegar for every 3 cups of water added.
4. Top with 2 more sprigs of dill and 3-4 more cloves of garlic.
5. Once the jar is filled to the top, seal jar. Gently shake to mix.
6. Set in window or outside where it will get some sun. Allow approximately 4 days for fermenting. If you like more sour pickles, can can let them stay in the jar for an extra day or two.
7. Refrigerate.
TIPS:
1. Use cucumbers that are small, young, dark green, firm, and have warty skin.
2. The jar should be filled to the top with the cucumbers and water (see photo).
3. The vinegar ensures the pickles will be crunchy and not soft. So if you like a hard pickle, add a bit more vinegar.
4. If you want your pickles to be ready in less than 4 days, you can boil the water with the salt and vinegar. Let it stand so it gets to room temperature. And then add it to the cucumbers. This speeds the fermenting time.
![]()
![]()
![]()
![]()
![]()


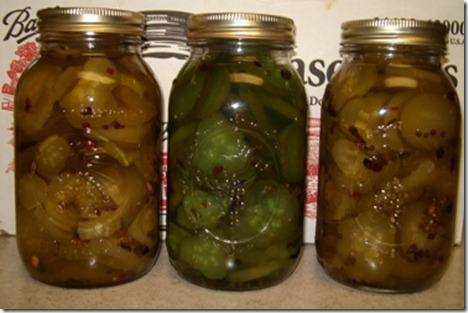




I did these over the weekend…they are great..thank you Mr. Greg
Nice brief and this fill someone in on helped me alot in my college assignement. Thank you for your information.
My first time canning dill pickles. At the last minute I realized the pot wasn’t tall enough. Water only went to necks of my two quart jars. The lids did seal. Can I still be able to eat these pickles?
I was wondering if you know or not, could I do these with zuchini? I have tons in the garden and want to try to use them up.
yes Lisa you can, I have done it before, and they work out great.
If I do not plan to store the dill pickles in the refrigerator, can I do the 10 minute water bath for preserving – the same technique as the bread and butter pickles?
Yes, you can do the 10 minute water bath as long as the lids are sealed well once done.