Gardening
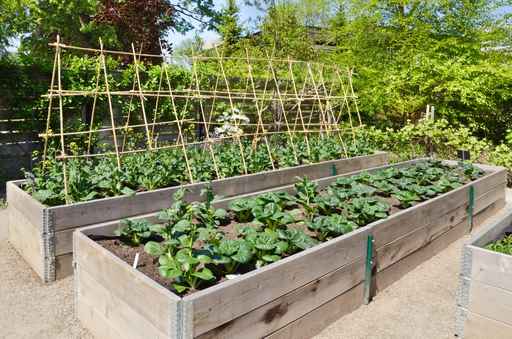
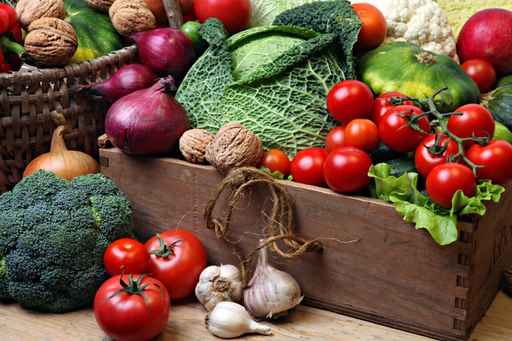
Growing vegetables in your own garden is not only good for you, it also helps to reduce your carbon footprint. Growing vegetables at home can be done in a single pot on your patio (See Below) or on a larger scale depending upon the space and time you have available. Choose the best site for your garden, preferably in a location that is easily accessible from your home.
Keep in mind when planning your garden:
• The size of your garden is entirely dependent upon the available space you have, the time that you have to garden and the food needs of your family.
• That the area receives 6 to 8 hours of direct sun per day.
• Full sun is ideal for all vegetables.
• Root and leafy crops (carrots, turnips, beets, leaf lettuce, spinach, etc.) can tolerate some shade.
• Put taller plants on the north side so that they don’t cast shade on the shorter plants.
• Make sure there is a water source near your garden or you’ll be lugging around a watering can.
• Select a level area with well-drained soil.
• Determine plant spacing by the size of the mature plant – their leaves should just be touching.
• Most vegetables can be planted over a long range of dates.
If there isn’t enough room at home for a vegetable garden, consider joining a community garden to grow your vegetables. Community gardens can be found easily throughout the county. It is as easy as googling your town and “community garden”.
Growing Vegetables in Containers
There are 7 major considerations in container gardening:
1. How much sun is available?
Choose plants according to how much sun or shade they’ll get each day. Most vegetables need at least 6 to 8 hours of direct sun every day. Leafy vegetables, such as lettuce, onions, carrots and beets will do okay in partial shade. But plants that bear fruit such as tomatoes, eggplant, squash, peppers need more than 8 hours of full sun.
2. What type of container?
Almost any container will do as long as it has good drainage. Smaller containers dry out very quickly in summer. The smallest for outdoor use is probably 8 to 12 inches in diameter and depth. In part shade, you may have success with smaller containers.If you are using recycled containers, scrub them well and rinse in a solution of 9 parts water to one part bleach. If containers are porous (clay, wood, cement) soak them well in water before filling so they won’t act like sponges and pull all the water out of your soil. A deeper container is always better than a wider container because it provides more space for the roots to grow down in search of moisture and cooler temperatures. This will enable plants to thrive during hot summers when more frequent irrigation is required. Containers should be at least 4” deeper than the longest plant roots.Since plants in containers are above ground, the roots are more sensitive to temperature extremes. Midsummer heat can kill tiny hair-like feeder roots. Without these feeder roots, the plant will wilt even if the soil is wet. Then larger roots become very susceptible to root rot fungus that can destroy the rest of the plant. Overheating of the soil is a common cause of failure in container plantings. Thick wood insulates best, dark-colored containers will absorb more heat, and light-colored containers reflect heat.
3. What should you plant?
Shallow-rooted crops like herbs, lettuce, green onions, radishes and spinach are easy to grow. Carrots, potatoes, turnips and other roots crops need much deeper containers. Choose a container that’s at least 4” deeper than the the length the roots will reach at maturity. Tall or sprawling vegetables (eggplant, peppers, squash and tomatoes) have extensive root systems. They will bear well if they have enough room for roots to develop. To get the most out of your limited space, choose high yielding and dwarf varieties with small-to-moderate sized fruit. These include beans, beets, carrots, lettuce, peppers, radishes and some varieties of summer squash and tomatoes. Stay away from varieties labeled “whopper”. Look for short, bushy rather than tall, vining plants. For the highest yield provide support for vining or trailing crops and add the stakes or trellis when you first plant the seeds or transplants so that you won’t damage roots by adding them at a later date.
4. Seeds or Transplants?
Plant beans, beets, carrots, cucumbers, lettuce, peas, radishes and squash from seed. Eggplant, peppers, and tomatoes are best purchased as transplants. Buy the smallest size available (6 packs or 4” pots), since they will develop better roots and grow to larger sizes more quickly than gallon-size plants can acclimate to the location.
5. Preparation of the soil.
Do not use garden soil. It may contain diseases and fungi and is usually very heavy and slow to drain. Buy a high quality soil mix that is sterilized and able to absorb moisture and drain quickly.
6. Fertilizing.
Plants “trapped” in containers cannot search for nutrients or water. Confined root systems demand frequent but light fertilizing during their growing period. Nutrients are leached from the soil with every watering and need to be replenished regularly. Two to four weeks after planting, begin applying a water soluble fertilizer (mixed one-quarter strength) with each watering. Organic gardeners can use liquid fish emulsion, liquid kelp or blood or bone meal. The 3 numbers on the fertilizer package – such as 10-10-10 – explain what the fertilizer is formulated to do. The numbers are always in the following order:
• Nitrogen – for green leaves
• Phosphorus – for flowers and fruit
• Potassium – for root growth
When one of the numbers is higher than the others, that means the fertilizer is designed to promote more growth in that specific part of the plant. Do not overfeed. A little is good, a lot is NOT better!
7. Watering requirements.
All containers dry out quickly. Watering requirements will vary according to the season, type of container, soil mix and sun exposure. Check containers daily. Stick your finger into the top inch of soil. If it feels damp there is no immediate need for water. If it feels dry, water until some runs out the bottom of the container. In mid-summer and on windy days this may be needed daily. In summer, provide a saucer that can fill with the excess water and then be reabsorbed as needed. In winter, remove the saucer so the plants don’t sit in water and stagnate.Water early in the morning to avoid wet leaves at night when temperatures drop and mildew and disease organisms flourish. Use a slow even spray to avoid washing out the soil.
Click HERE for more of my gardening posts
*information provided by University of California Cooperative Extension
Leave a comment